Set up GradeCube
A few minutes, once a semester. Then your AI just knows your classes.
Install and pin GradeCube
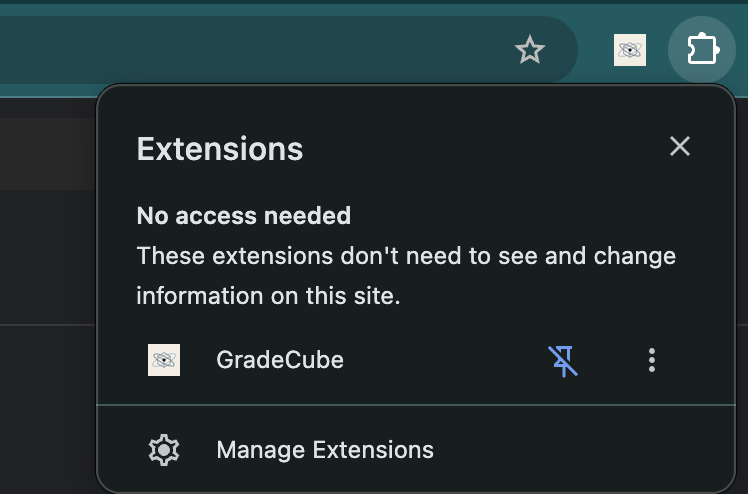
Add GradeCube from the Chrome Web Store, then pin it to your toolbar (click the puzzle-piece icon, then the pin next to GradeCube). That little icon is your home base. GradeCube also shows a live setup checklist, in the toolbar popup and in the pill on claude.ai or chatgpt.com, that checks these steps off as you go.
Open a class, and it syncs
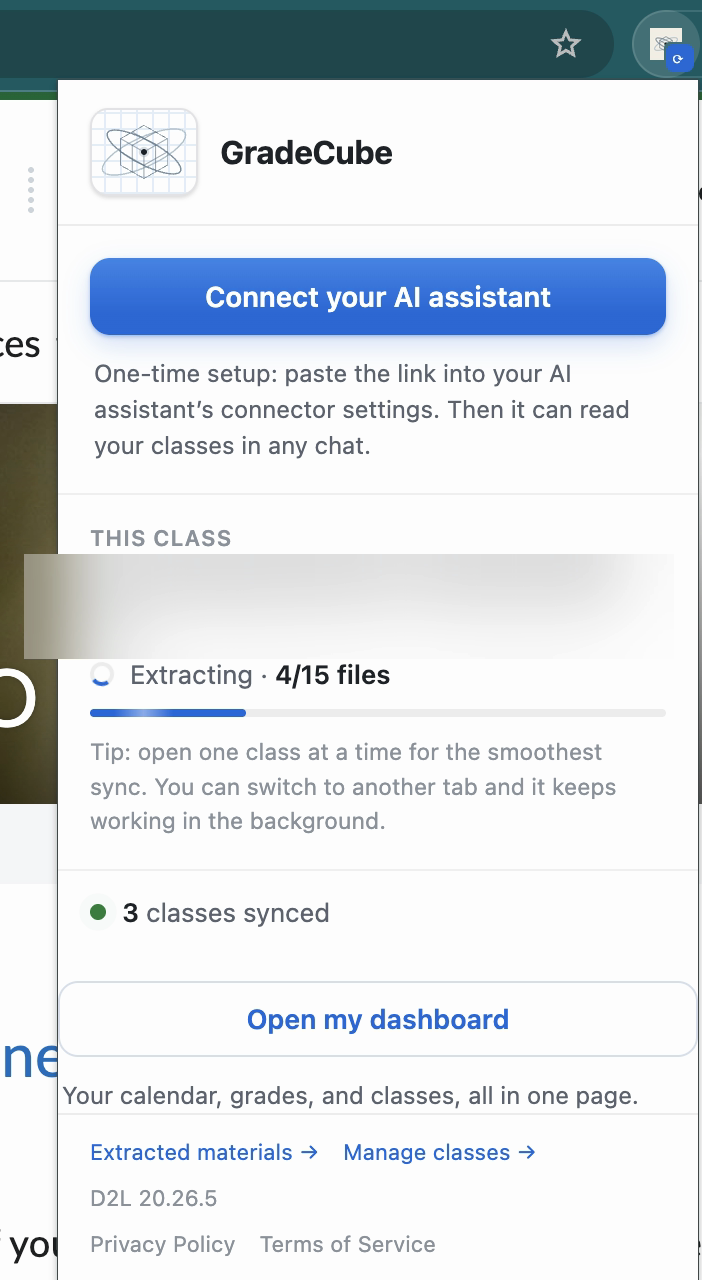
Log into your school like normal and click into a course. The first time, a class takes up to about 4 minutes to pull in everything, and that is a one-time thing. After that, re-syncs are quick, around 15 seconds. You can switch tabs while it works.
Heads up: Sync one class at a time. Opening several courses at once can cross up which materials land where, so let each class finish before you open the next.
Your dashboard, no AI required
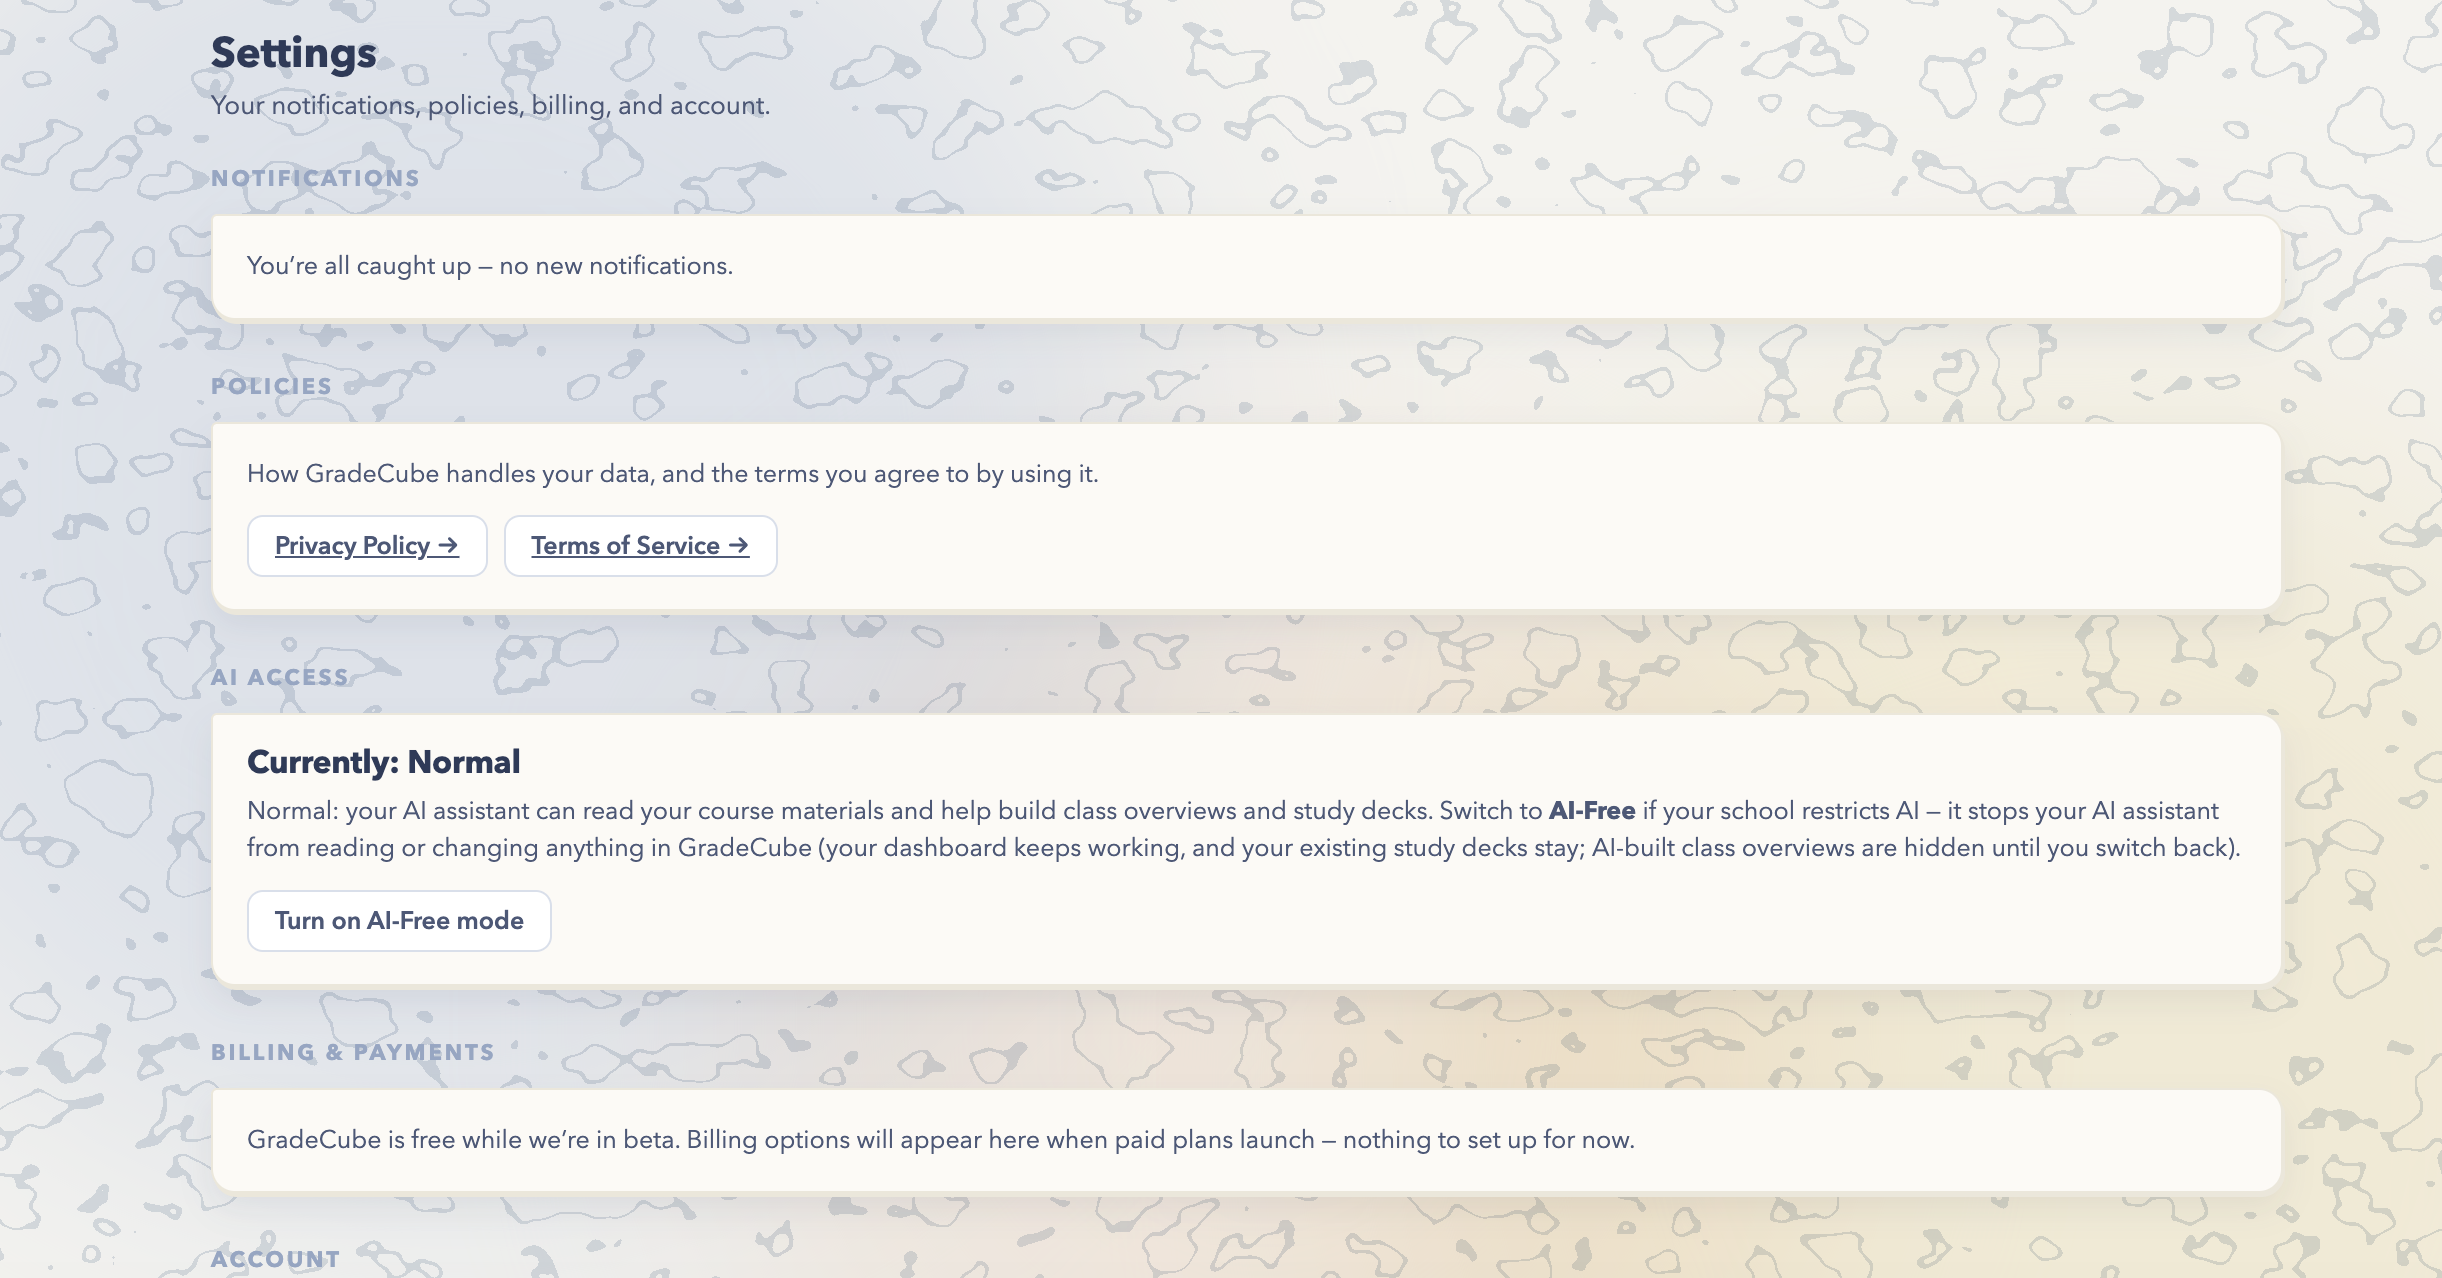
Right away you get a GradeCube dashboard with your calendar, grades, classes, and materials in one place. The first time you open it, it asks you to set a short PIN. That PIN is what keeps your dashboard private, especially on shared computers. You are in control: switch to AI-Free mode anytime, read the policies, and manage your data. All of this works without connecting any AI.
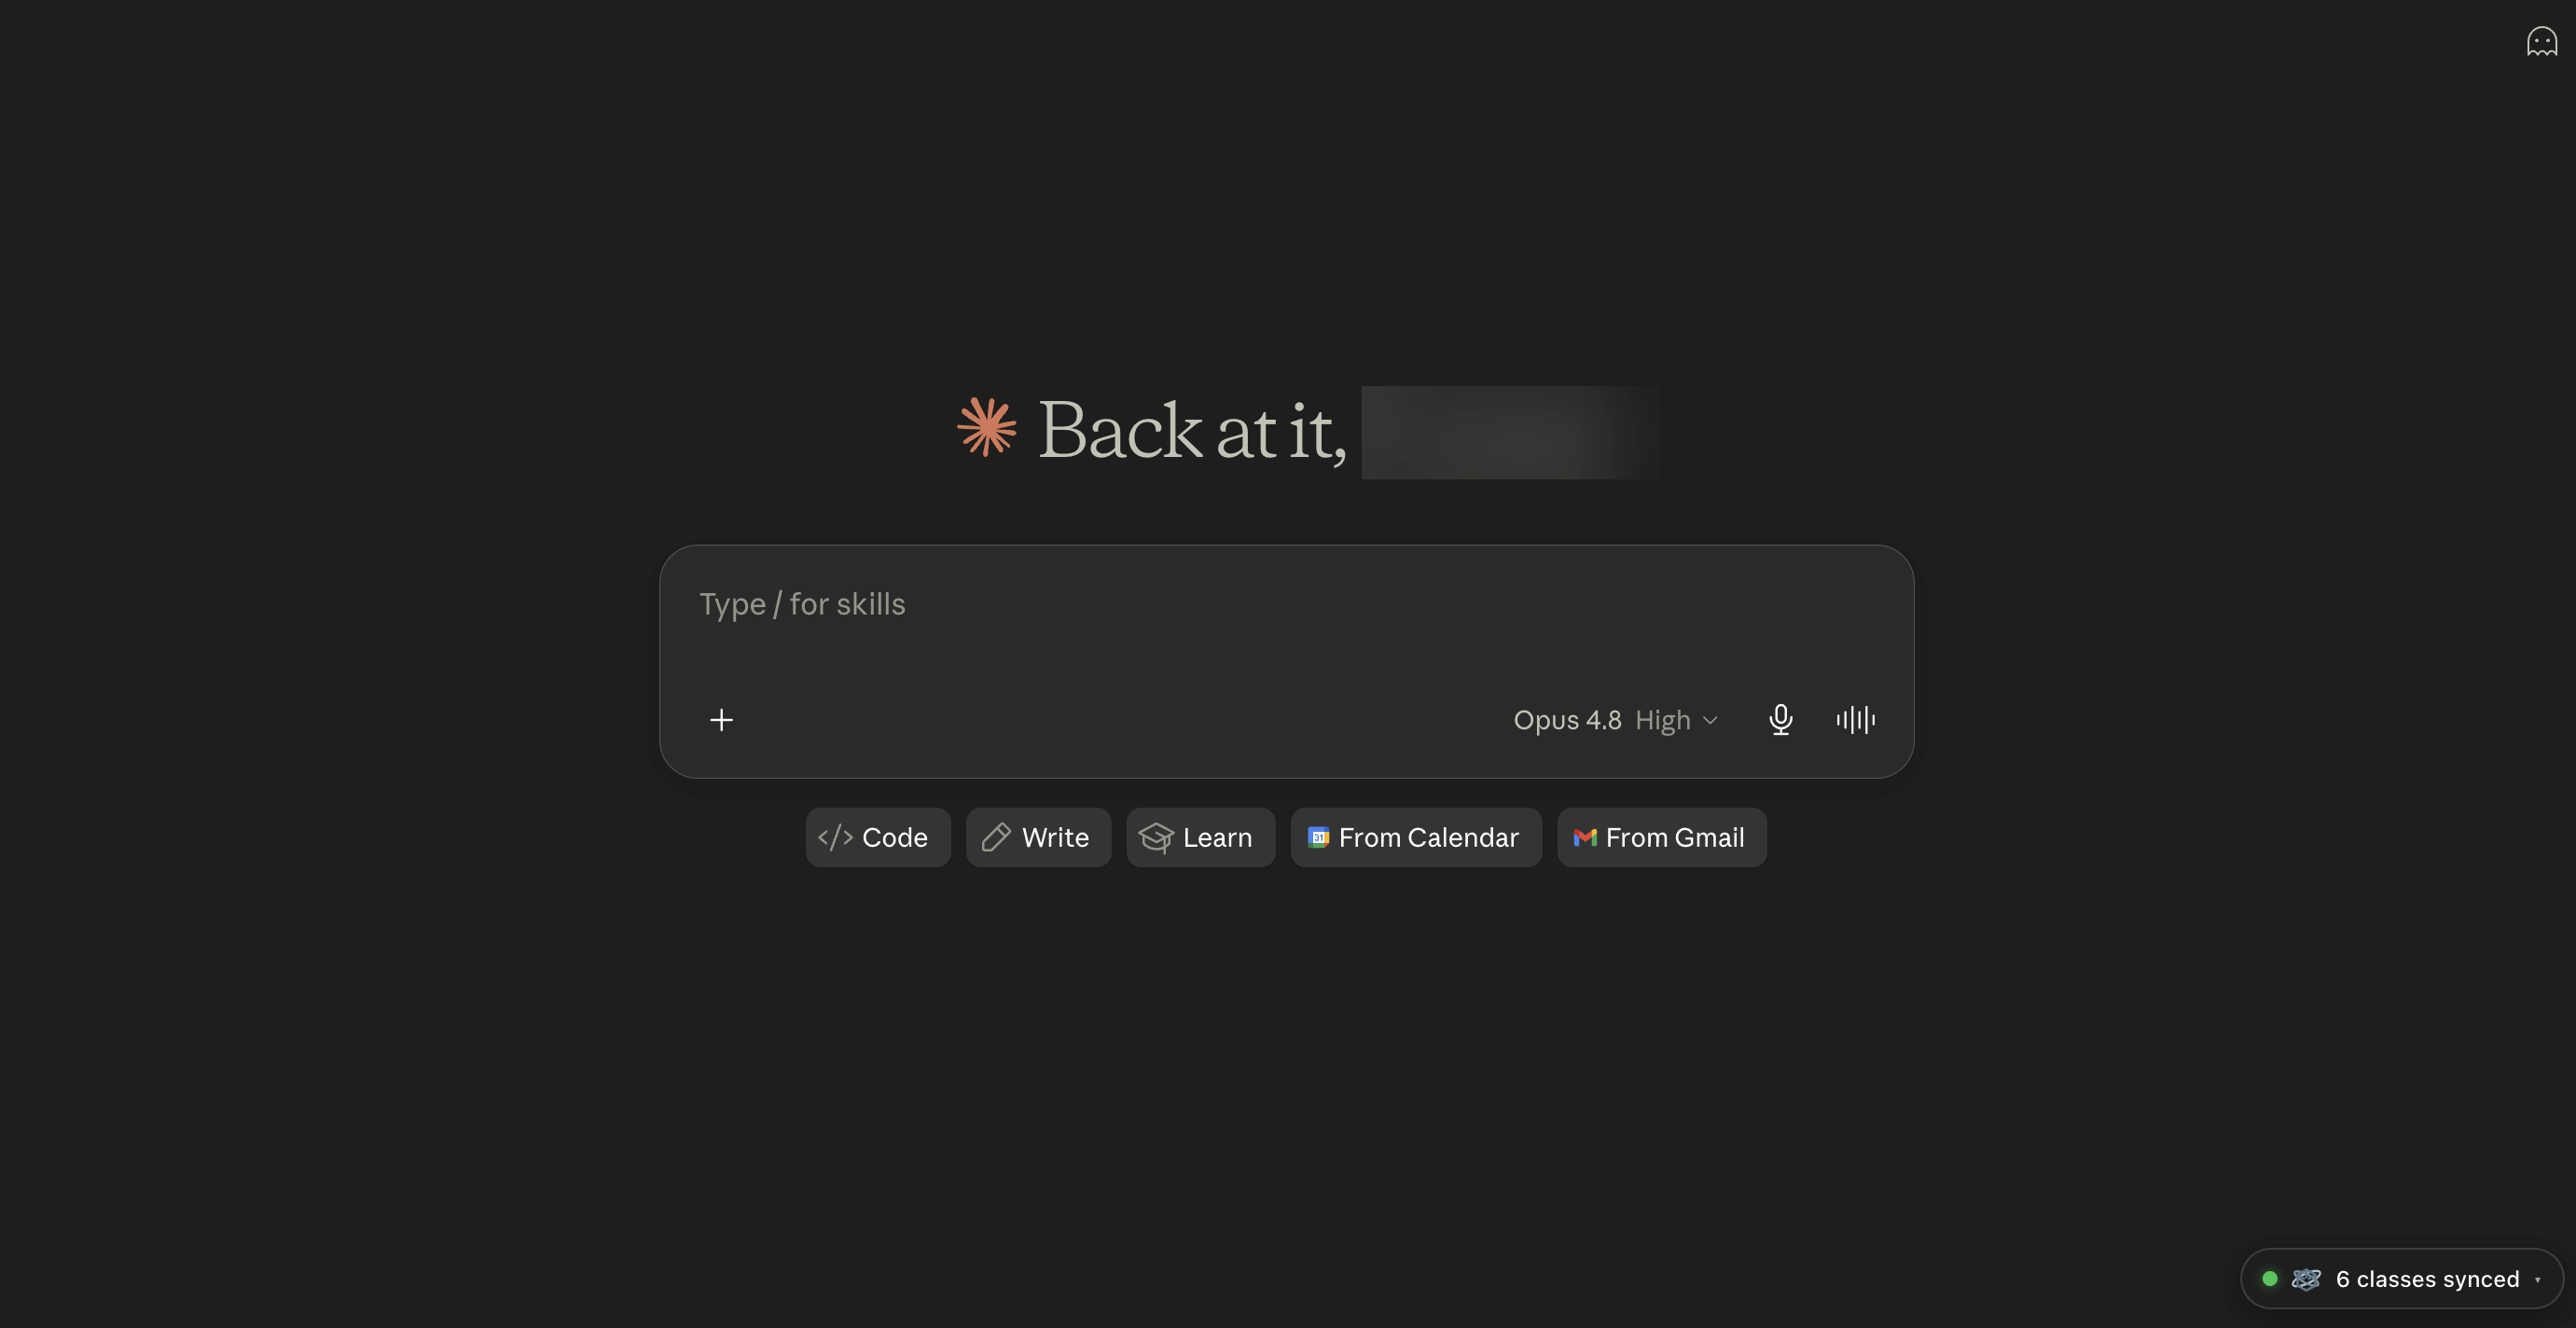
Find the GradeCube pill
Want your AI to know your classes too? Open the assistant you use (Claude or ChatGPT) and look for the GradeCube pill in the bottom corner of the page. That pill is your connect point.
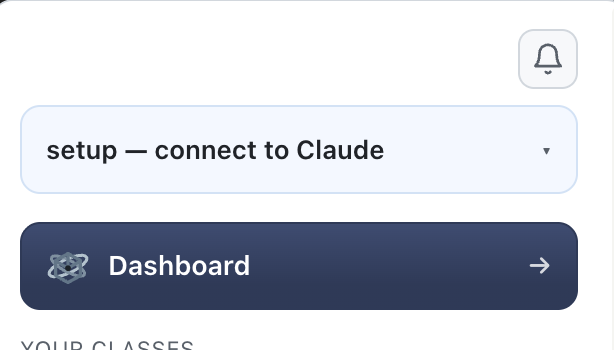
Copy your connect link
Click the pill, choose Connect, and copy your connect link. This is the one link that lets your AI read your classes, and you only do it once a semester.
Which AI are you connecting?
Pick the assistant you use. The steps differ slightly, and we will show you the right ones. You can come back and do the other later.

Open Claude’s Connectors
In Claude, go to Settings, then Customize, then Connectors. Click the + (or “Add custom connector”) to start a new one.
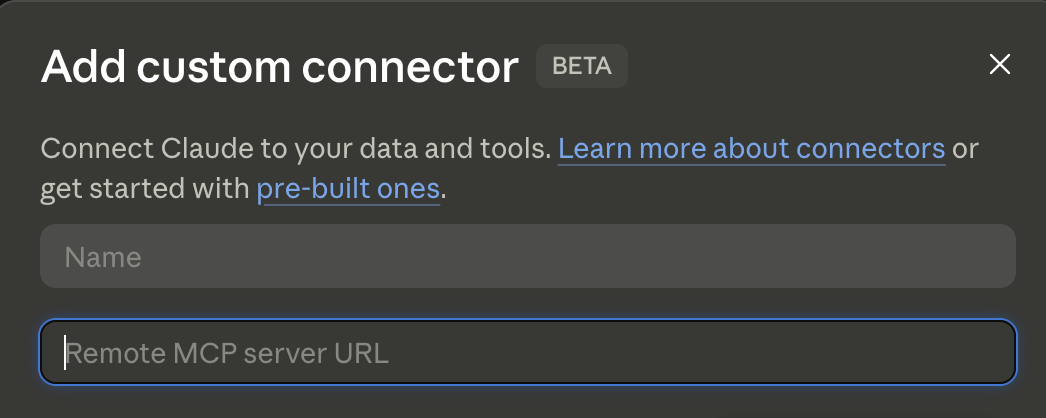
Add a custom connector
Give it any name you like, such as “GradeCube,” then paste your connect link into the “Remote MCP server URL” field and add it.
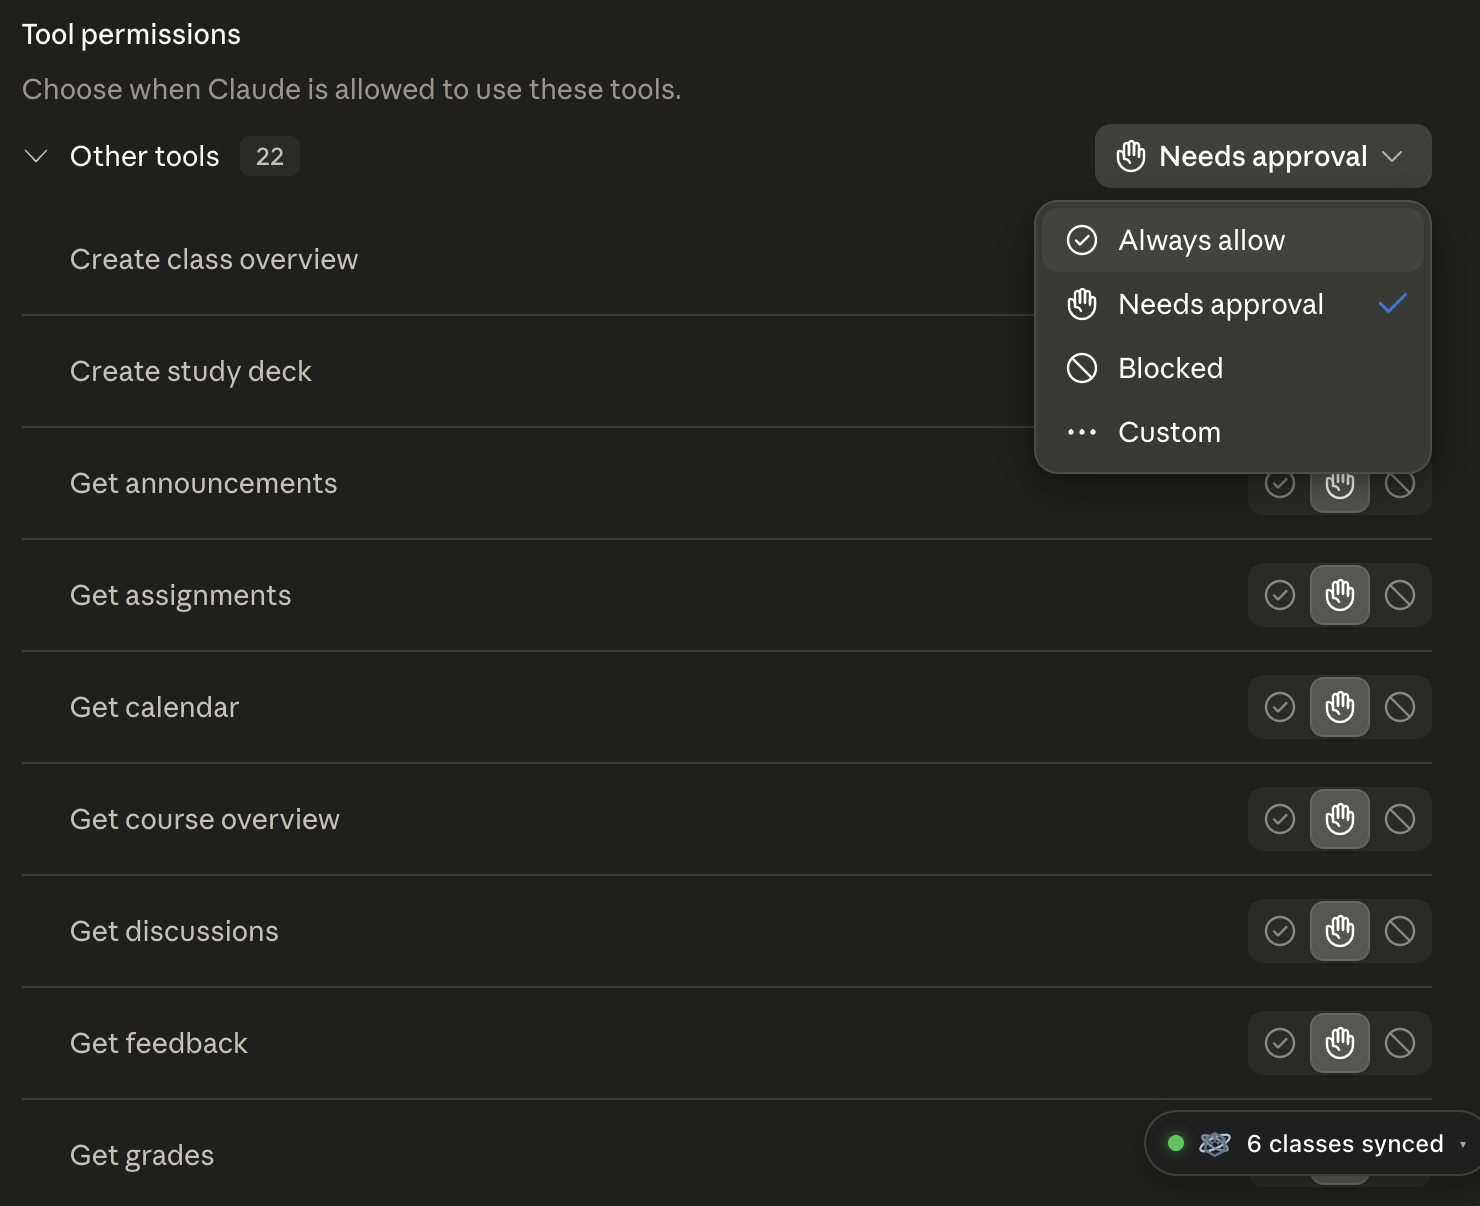
Set GradeCube to “Always allow”
In the connector’s tool permissions, switch GradeCube to “Always allow” so it can answer about your classes without asking for approval every time.
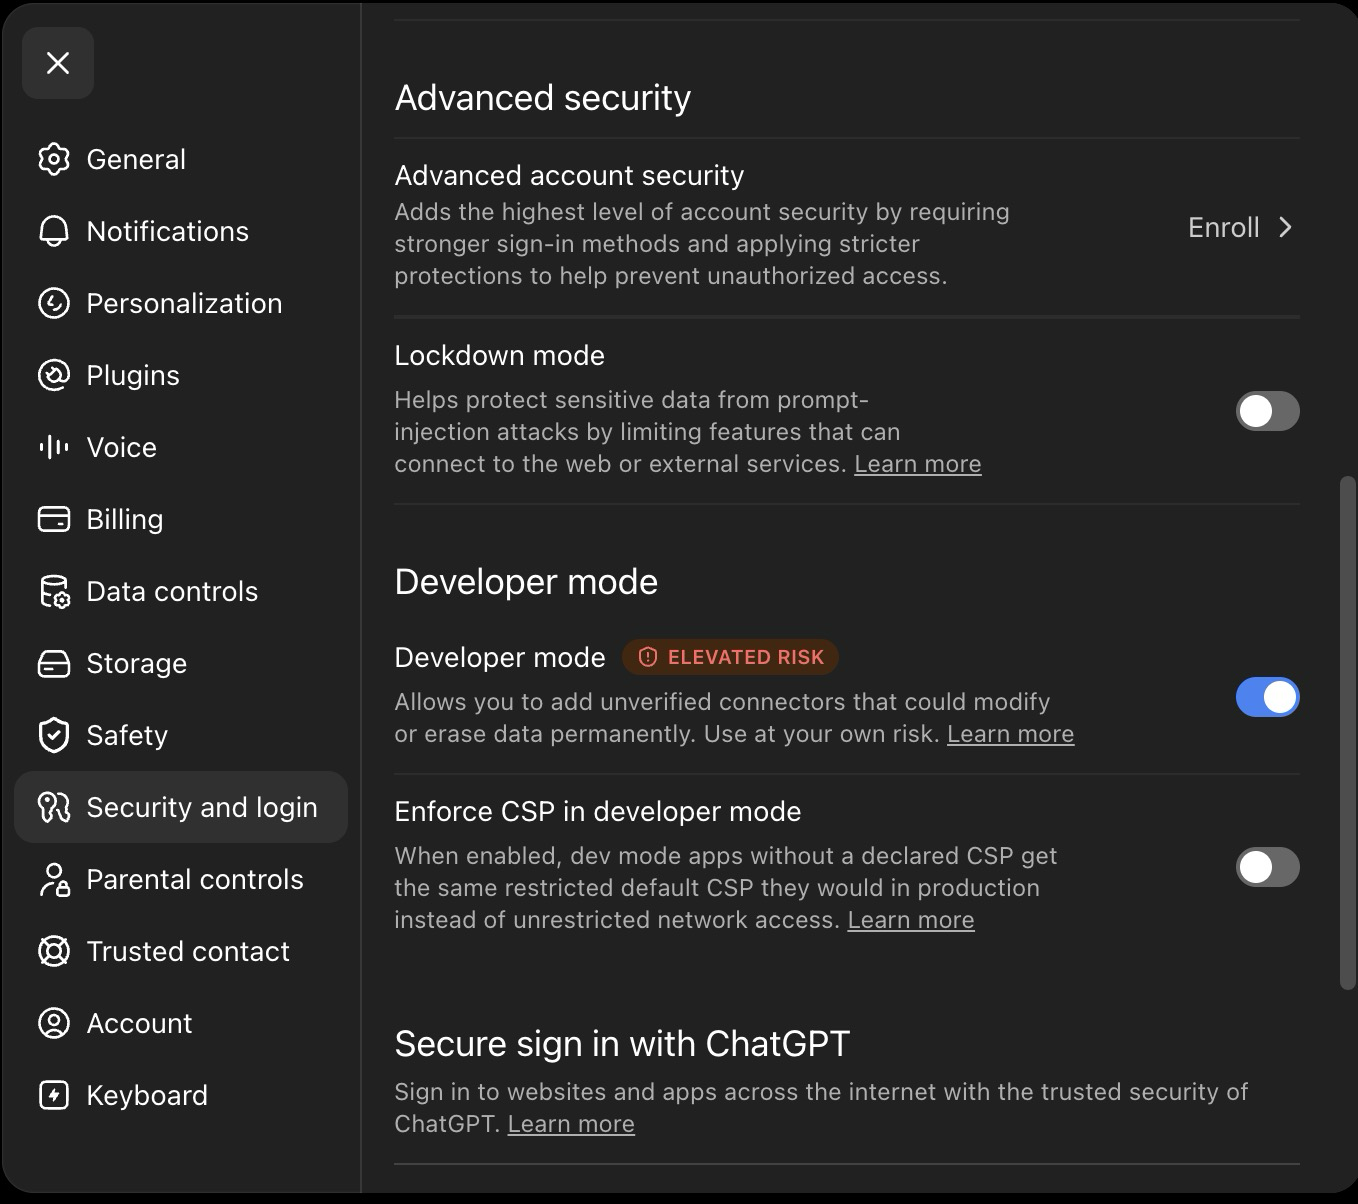
Turn on Developer mode
In ChatGPT, go to Settings, then Security and login, and scroll down to Developer mode. Switch it on. This is what lets ChatGPT add a custom connector. (The “elevated risk” label is ChatGPT’s standard wording for every custom connector.)
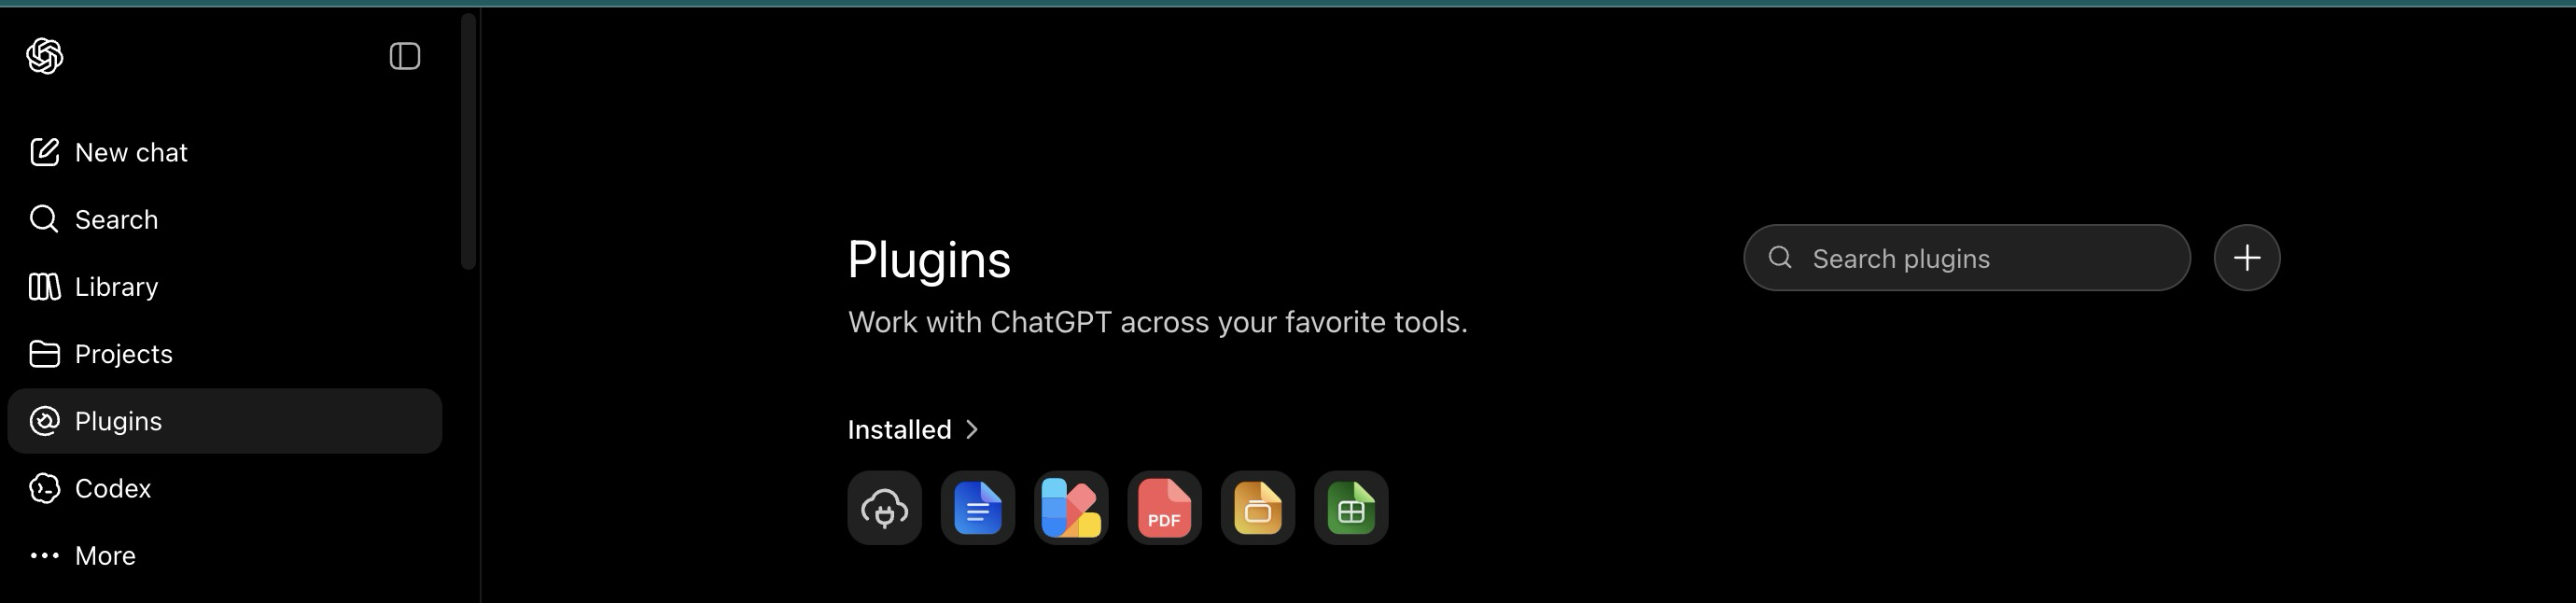
Open Plugins and click +
Close Settings and click Plugins in the left sidebar of the main screen. Then click the + button in the top right, next to the search box.
Heads up: There are two Plugins screens. Settings has its own Plugins tab that can only browse, with no + button anywhere. You want the Plugins page in the left sidebar.
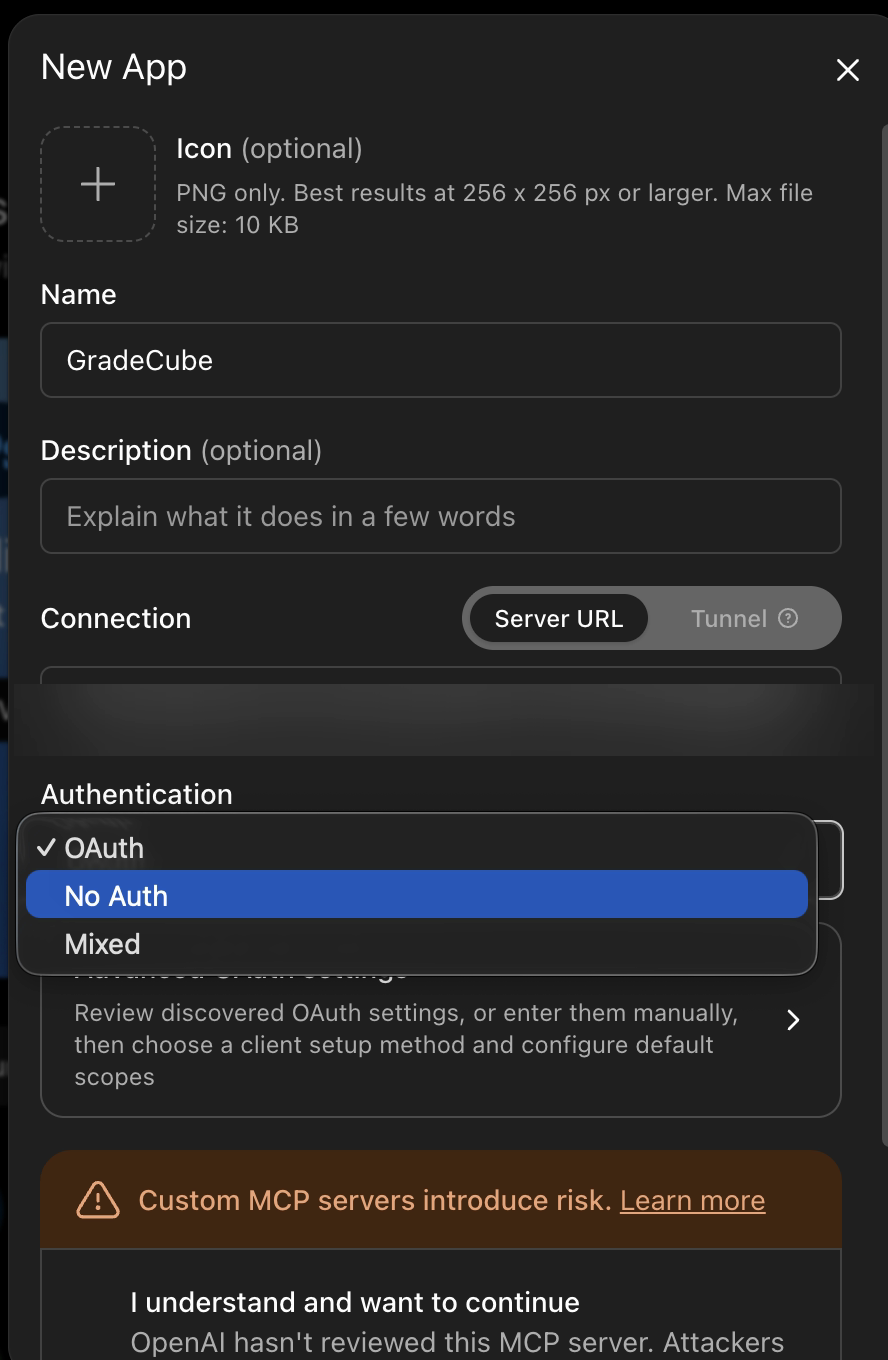
Create the app, with no authentication
Name it GradeCube, paste your connect link as the MCP Server URL, and set Authentication to “No authentication.” Then continue. That last setting is the one people miss.
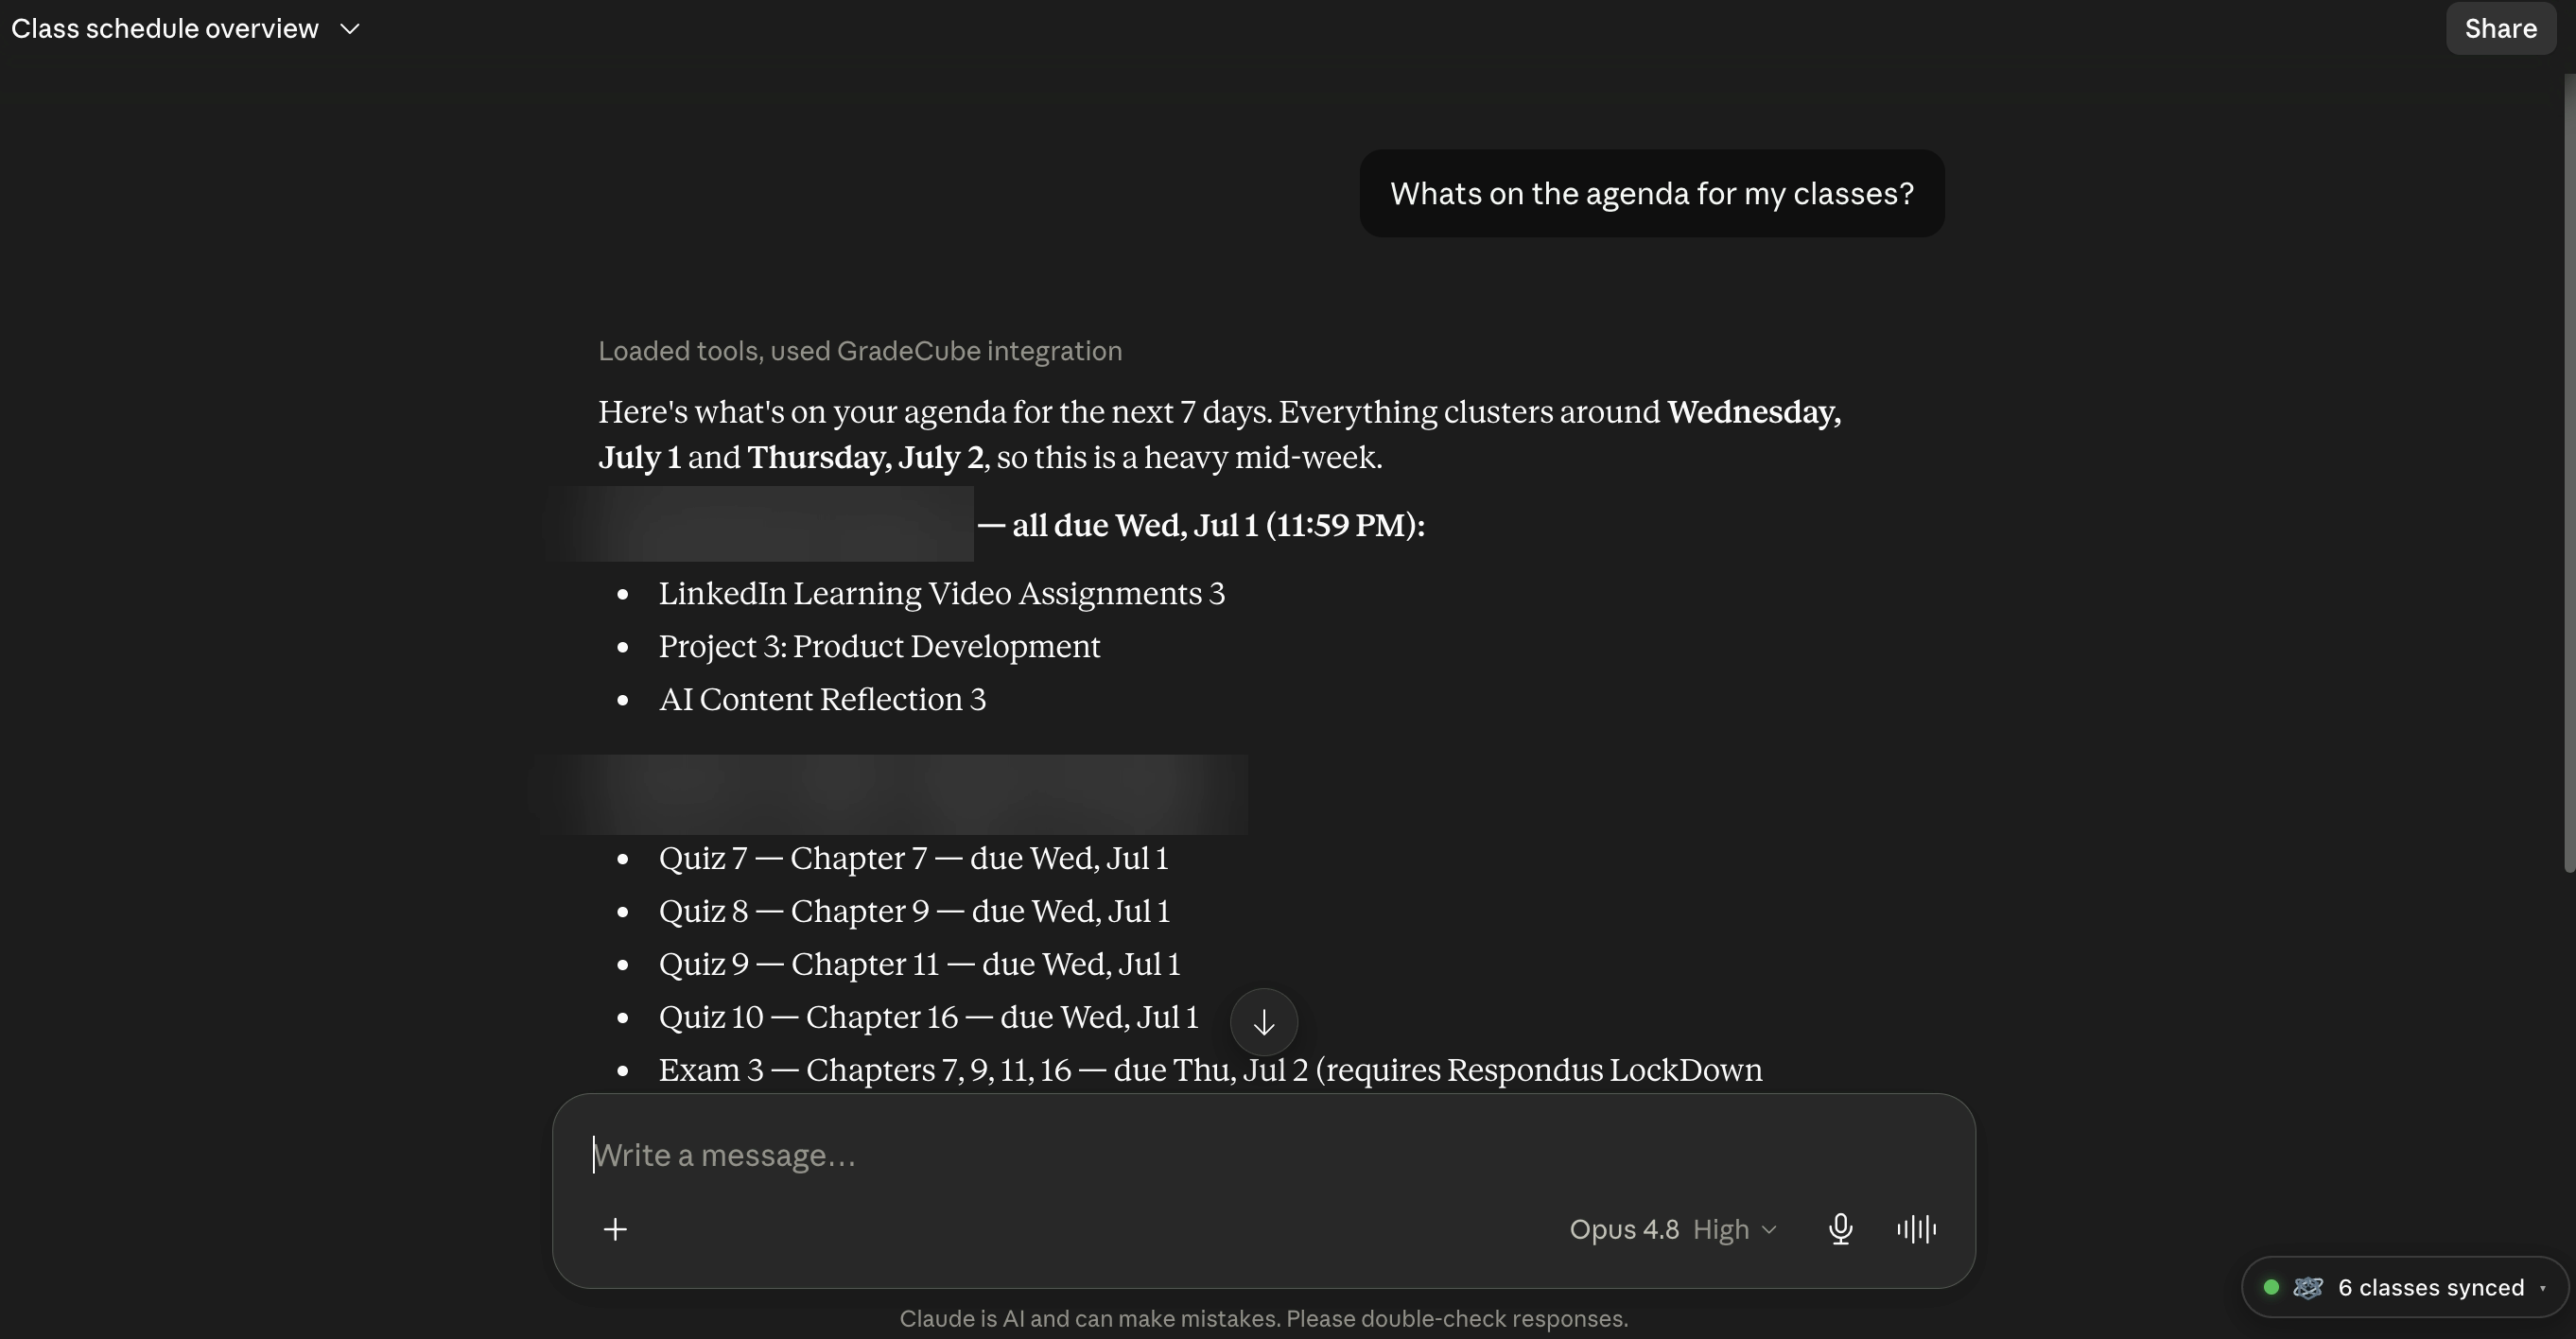
Ask anything about your classes
Start any chat and try “What’s on the agenda for my classes?” or “What do I need on my final to keep an A?” Your AI answers from your real coursework, with the due dates already worked out for you. That’s it, you’re set for the semester.